
That darn “Yogurt” button on my Instant Pot was taunting me, calling me and I was resisting.
I always thought that making homemade, non-dairy, fermented yogurt was an over the top, crazy DIY pursuit. Then I decided that I needed to find out for myself and see if I could demystify how to do it, even if just to help clients. Plus, I needed to know, “ Was making, versus buying, yogurt worth it?”
At first, after reading up on how to make non-dairy yogurt and watching many videos, my head was spinning. There is a lot of online chatter about how easy it is but mostly those are to make a thickened yogurt like substance. I wanted to make an authentic, fermented yogurt that contains probiotics.
I discovered in my research and trials that there are many roads to disaster but in the end I found consistent success. Here is what I learned so you can feel confident using the yogurt button on your Instant Pot too.
Potential Pitfalls and Issues:
-
1.The non-dairy milk.
For everyday life I often recommend using many types of non-dairy milk but it is not quite as easy when it comes to making yogurt. Many non-dairy milks contain thickeners and preservatives which are not conducive to fermentation. That left me focusing on soy and rice milks with no additives. (Note: I did not test pure almond, hemp, and oatmeal milks because I did not have them available and I have not yet tried homemade nut milks.) In my experiments, rice milk was a total fail, leaving me with rice water and a little sediment. But soy milk was a huge success!
CONCLUSION: Use a pure soy milk that contains only soy and water. I tested Westsoy Organic Unsweetened Soy Milk, Kirkland Organic Soymilk Plain and EdenSoy. -
2.Starter choices.
I tested 4 types of starters: a) Cultures for Home, Vegan Real Yogurt (the most expensive per preparation), b) Ultimate Flora Probiotic 50 million capsule (my favorite, 2 capsules / quart), c) some existing yogurt from a previous batch, and b) Solgar 40+ Acidophilus 1.5 Million capsules. I had success with all but the Solgar. I will come back and try this again though because I have heard some successes and believe my fail might have been simply expired capsules.
CONCLUSION: You can use almost any live culture starter but my preference was for the refrigerated 50M probiotic capsule because it made the firmest yogurt, was cost effective (less than $1 for an entire batch of yogurt) and in the house. Making a batch with a few tablespoons of a previous batch is equally good and the most cost effective but I do not always remember to save some yogurt. -
3.Pre-heating the milk or not?
The process of fermentation for yogurt happens at 110 degrees F (43 C.). It is where the Instant Pot will hold the temp and a good idea to gently preheat your milk to that point to activate the starter. It is also best to test it with a food thermometer because hotter milk will kill the starter. If you don’t have a thermometer, just heat until warm. The Instant Pot can do the rest. I tried both warming the milk and starting at room temp. My room temp start failed but I am not sure why since I have heard others have success.
CONCLUSION: It’s easy enough to pre-warm so that is what I have settled on doing.
Tools Needed
-
2.Food thermometer (optional)
-
3.Blender
-
4. 4-6 eight (8) ounce glass jars
-
5.Unsweetened non-dairy milk
-
6.Vegan yogurt starter. (Cultures for Home, Vegan Real Yogurt, Ultimate Flora Probiotic 50 million)
Instructions:
-
1.Make your yogurt at night or first thing in the AM so you will have your Instant Pot back when you want to use it for meals.
-
2.Measure 1 quart of PURE non-dairy milk and gently heat to 110 F. (43 C).
-
3.Mix in your starter. I like to use a blender to make sure it is mixed thoroughly.
-
4.Pour into glass jars or right in your Instant Pot for a big batch
-
5.Place jars inside the inner pot of your Instant Pot. Put the cover on, lock and close the vent even though it will not go to pressure. This is simply to keep the heat in.
-
6.Press the YOGURT button and adjust time to between 9 -12 hours. I set for 9½ hours. The longer it is left, the tangier it gets. The time on your pot will tick upwards until it is done. Don’t worry about removing it right away as leaving it a while after it finishes only makes it a little tangier.
-
7.Cover your jars and refrigerate. As they cool they will get firmer.
-
8.You can also make a thicker, strained greek yogurt using cheese cloth lining a fine strainer after your yogurt is ready. When I did this I ended up with about half as much. And save the whey for use in smoothies or cooking.
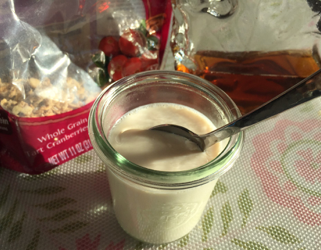
Once you try this you will never be intimidated by that yogurt button again and will make the best non-dairy yogurt you have ever tasted. Enjoy your yogurt any way you like, plain or with a little maple syrup, fruits, or nuts.
Share your own tips and experiences in a quick email or on my Facebook post. Be GLAD for health!


welcome about services stories contact blog reviews oils resources